
Mirth Connect and HL7 Soup message relay
What this tutorial builds
This tutorial demonstrates how to send and receive HL7 messages between Mirth Connect and the HL7 Soup message editor. Mirth Connect acts as a relay: it receives an HL7 message, changes the message a little, forwards it to another TCP/MLLP receiver, and writes a file copy at the same time.
Use two HL7 Soup instances as practical testing tools. One sends the original ADT A04 message to Mirth Connect, and the other listens for the relayed message. The same relay idea fits the Integration Soup product family too: receive a message, transform it, route it to one or more destinations, and make sure the sender sees the right success or error result.
Before you start
- Mirth Connect installed and available in the Administrator.
- HL7 Soup installed so you can send a test HL7 message and listen for the relayed message.
- An ADT A04 or similar HL7 message to send through the channel.
- Local test ports available. This walkthrough uses Mirth Connect on port
6672and an HL7 Soup listener on port2222. - A folder where Mirth can write file output while testing.
Step-by-step guide
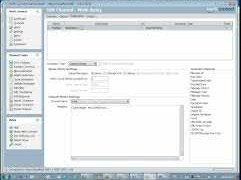
- Create a new Mirth Connect channel. Name it something clear, such as
Mirth Relay, so the dashboard makes sense when you start testing. - Configure the source as a TCP Listener. Use the standard HL7 TCP/MLLP transport. Set the listener to port
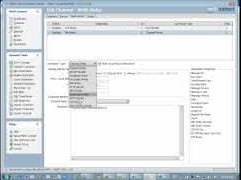
6672so HL7 Soup can send directly into Mirth Connect. - Add a TCP Sender destination. Create the first destination as a TCP Sender named
TCP Relay. Point it at the system that should receive the message. For this local test, that is an HL7 Soup receiver on port2222. - Make a small transformation to prove the relay is working. Use the received HL7 as the outgoing message and append an extra next-of-kin line. Copy an existing next-of-kin segment, change the name, and make the relayed message visibly different from the original.
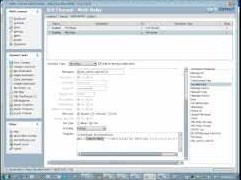
- Add a File Writer destination. Create a second destination named
File Relay. This destination writes the HL7 message to disk so you can keep a copy of each message Mirth processed. - Use MSH-10 as the file name. Paste a sample HL7 message into the transformer message template, open the message tree, find
MSH-10, and drag the message control ID into a variable. Use that value in the file name so each output file is unique. - Write the inbound message into the file body. Use Mirth's encoded message data as the main file content, then add the second next-of-kin line used in the file writer example.
- Deploy the channel. Save the channel, deploy it, and confirm the channel status is Started before sending from HL7 Soup.
- Send a test message from HL7 Soup. Create a new send in HL7 Soup to
localhoston port6672. This sends the message to the Mirth source connector. - Check the Mirth dashboard when a destination fails. Your first send may appear accepted by the source, but the TCP relay destination will fail if no HL7 Soup receiver is listening yet. The file writer can still succeed, which is a useful clue while testing.
- Change the response behavior. Set the source response to
After all destinations have completed. That way HL7 Soup gets an error if the TCP relay destination fails, which is much more useful while testing a relay. - Start the HL7 Soup receiver. Open a receiving tab in HL7 Soup, listen on
localhostport2222, and click Start. Resend the message and confirm that HL7 Soup receives the relayed message. - Check the file output. Open the output folder and confirm the new HL7 files use the control ID as the file name. Load one of the files and check the appended next-of-kin line at the bottom of the message.
MSH-10 for a unique file name.
Response handling matters
A Mirth source can accept a message even when a destination fails. That is not always what you want. For a relay test, the sender should know whether the message actually reached the destination.
Set the Mirth source response to After all destinations have completed when you want HL7 Soup to report a failure if any destination, such as the TCP Sender, cannot complete.
Useful checks and troubleshooting
- HL7 Soup says the send succeeded, but the relay failed: check the Mirth source response setting. It may be responding before the destinations finish.
- TCP relay destination is red in the Mirth dashboard: confirm the HL7 Soup receiver is listening on the same host and port configured in the TCP Sender destination.
- No message arrives in HL7 Soup: make sure the receiving endpoint has been created and started, not just configured.
- Files overwrite each other: use
MSH-10, the message control ID, or another unique message value in the file name. - The output message looks unchanged: check that the destination transformer is using the altered message content and that the next-of-kin line is being appended to the correct destination.
Related tutorials
- Create Mirth Connect testing ACK responses
- Introduction to the HL7 Soup Editor
- Validate, highlight, and compare HL7 messages
- Return to the HL7 tutorial directory
Download 30 Day Free Trial of HL7 Soup
Video Transcript
Read the full transcript
In this tutorial we're going to look at using Mirth as a relay for receiving an HL7 message, writing that out to another system, and also writing it out to a file. We will transform those messages as we go, so we can create some real-world examples here.
First of all, I'm going to start by creating a new channel. I'm going to call it Mirth Relay. I go to the source and set this one as a TCP Listener, which is the standard transport for HL7 messages. It's using MLLP on port 6661, and I'm going to change that across to port 6672 for my message.
Now I'm going to create the destination. My first destination is going to be my TCP relay. It will be changed across to a TCP Sender, so we're going to forward that on to another system that's listening for it. I'm going to configure that to port 2222.
If I test this connection, there's nothing running at the moment, so I get an errored response. That's fine. I know that's going to happen. What I'm going to do now is alter this message. It's preconfigured with the message that was received, and we're just going to alter that message slightly.
For this demo, I'm going to look at that message quickly. This is the message I'm going to send. It's an A04 for registering a patient, and all I'm going to do is add an extra next-of-kin data line. The way I'm going to do that is copy the existing one to make this tutorial easier. I come down to the end of the message, paste it in, and change the name to Smith and Bob. So Bob Smith as the next of kin will be appended to the bottom of this message. Pretty straightforward.
I'm also going to create a second destination. I go New Destination again and call this one File Relay. It will get a type of File Writer. I'm going to write this out to my C drive, and I want to give it a unique file name.
What I'm going to do is come back to the message, copy the entire message to my clipboard, and then come back into Mirth. Now I want to get the message control ID out of this and put it in as the file name. Having selected File Relay, I go to Edit Transformer and up to Message Templates. This is an HL7 message, so I can paste that into there and use this as our sample message tree.
If I now click on Message Trees and go to the message tree, I can go up to MSH and scroll down to MSH-10, which is the message control ID. I expand this out as far as I go until I can see the number that Mirth has transformed from the message template I pasted in. I can just drag that across. It's now created a variable, and I'm going to copy the name of it. That basically gets its value from MSH-10.1, again the message control ID.
I go back to the channel, and now I should be able to grab that and drop it straight onto my file name. I didn't even need to copy it like I did. Now I can just call it HL7.
Into this message, I'm just going to put the encoded data, which is the message that came in. I can just drag that down and paste that in there. I will also put in this next-of-kin information, so I copy that and come back to this. For this particular one, I'm going to change the name to Jones.
Now we've completed our relay. I'm just going to save that, go back into the channel list, and deploy the channel. I've checked that it has gone into the Started status.
If we recall, I'll go back to my channel for a second just so I can show you my source was on port 6672. I'm going to copy that and go into HL7 Soup. I'm just going to create a new send. I am on localhost, so the server is correctly configured. I'm just going to paste in the appropriate port and hit OK.
Now that I've created that send to localhost, I'm going to test it so I can show you what happens when I send this message. As we can see, the message has gone through. It's received and accepted that. Of course, that should have failed.
If we go back to Mirth and look at its dashboard, I have an errored message here. The reason that's failed is because HL7 Soup was not yet configured to receive that message. I double-clicked on that, so I can now see that the TCP relay errored, but the file relay actually sent, so that one succeeded.
I could now go and diagnose why I wasn't able to receive that message, but since I know what it was, I'm going to go back to my channel and edit my channel. The problem I have here is that it actually said it was a good send, and I don't want it to be a good send because it did actually fail. So I'm going to change my response from After Source Transformer to After all destinations have completed. Then I go back to my channel, save it, and redeploy it.
Now if I hit Send, the response is an error, which is correct. Let's go and fix that error. We're going to create a new tab, and I'm going to set up a receiving endpoint. I'm going to listen to localhost on port 2222, as we said. That's configured. I'll just delete the sample message here so we can see the new one come through.
Now I can click Send, and it's going to fail again. That is because I didn't click Start. So I'm going to click Start, and then we're going to come back to our main message and try another message.
I'm going to hit Send to localhost, and now we've got a successful receipt. The message has come through. I can continue sending through the demos, one and two, and we can see that they're all flowing through correctly to our listener.
We should also be able to go to my C drive. If I scroll to the bottom, we will see these new HL7 messages that have been created. They've got the control ID as their file name, and they are now loadable up into the other application. If we scroll to the bottom of those, we'll see our next-of-kin information stamped onto the bottom.