
Validate, highlight, and compare HL7 messages
What this tutorial shows
The real trick to an HL7 integration is making sure both sides agree on the definition of the messages. Traditionally that comes from hundreds of pages of documentation that neither side gets totally right. HL7 Soup lets you turn the important parts of that agreement into visible highlighters and validation rules, then share those rules with your integration partner.
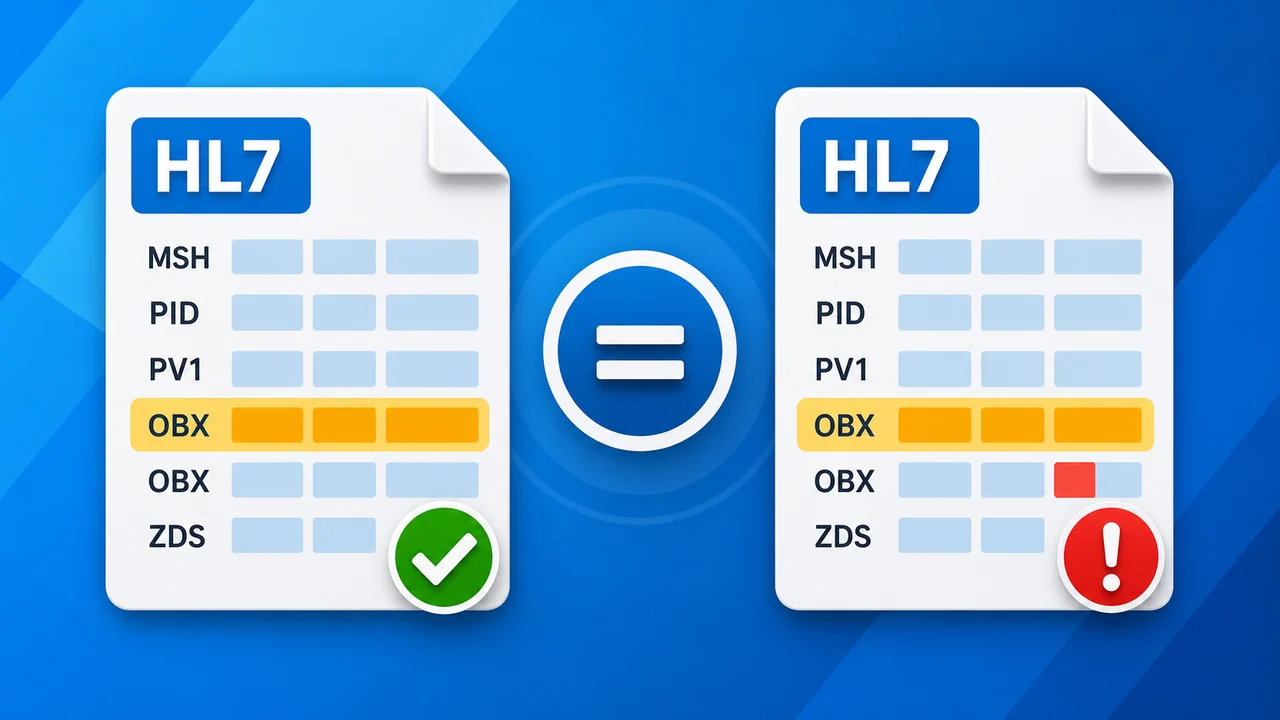
This tutorial walks through three related jobs: highlighting the fields you use often, marking invalid values in red so they stand out immediately, and comparing one HL7 message against another to find subtle structural or value differences.
Before you start
- Install HL7 Soup and open the HL7 Soup Editor.
- Use the included sample messages, or load several messages from the same feed so you can see rules apply across the list.
- Know the HL7 field paths you care about. This tutorial uses
PID-5.1for the patient's last name,EVN-3for a date/time example, andPID-8for administrative sex lookup validation. - Have one good reference message available if you want to generate compare rules from a known-good structure or set of values.
Step-by-step guide
- Open HL7 Soup with sample messages. Start with the sample message list so you can watch the same rule apply to more than one message.
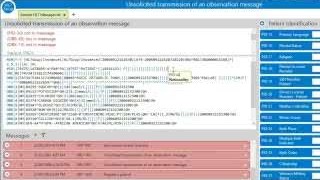
- Highlight a field you need often. Click the patient last name in the interpretation window or message editor, then right-click and add a green highlighter for
PID-5.1. The same field is now easy to find as you move through messages. - Add conditions to the highlight rule. A highlighter can check more than existence. Use conditions such as equals, contains, has any value, is not a value, or does not have a value when the color should only appear for certain data.
- Use date-aware checks for date fields. Date fields get useful comparisons such as greater than and less than. In the tutorial, an orange rule marks dates older than 2014, which is handy when a system change creates a risk boundary.
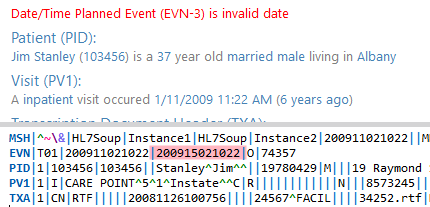
- Reserve red for invalid values. Add a red validation rule for a field such as
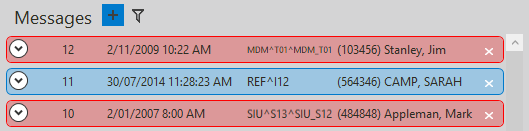
EVN-3. When the date is invalid, HL7 Soup highlights the field, adds an error in the interpretation, and marks other loaded messages with the same problem. - Filter the messages list. Right-click the message list and create a filter for valid or invalid messages. That gives you a practical work queue for fixing data issues.
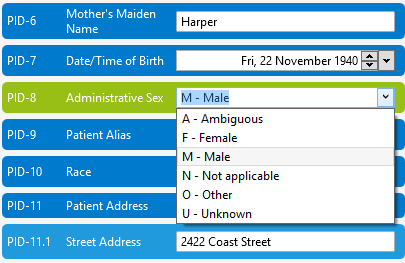
- Validate lookup table values. Mark
PID-8invalid when its value is not found in the HL7 administrative sex table. HL7 Soup highlights the bad messages and explains what is wrong. - Manage highlighters and validation sets. Open the Highlighters and Validation window to edit rules, change values, add tooltip text, clone sets, and keep separate rules for different customers or applications.
- Export a validation set. Send a completed rule set to colleagues, customers, or suppliers so they can test their own messages before they send them to you.
- Generate bulk rules from a message. Use the management window to create sets for invalid dates, lookup tables, missing fields, empty values, or values that differ from the current message.
- Compare two messages. Generate Value Is Different rules to compare field and component values. Generate the rules from both messages when you want the comparison to highlight differences both ways.
Practical validation examples
Use red highlighters for problems that deserve action, not just things you want to notice. Invalid dates are a good example because they can be surprisingly hard to spot in raw HL7. HL7 Soup can also use lookup tables, so a coded field such as PID-8 can be marked invalid when it does not match the expected table values.
When to create separate validation sets
Validation sets are useful when one rule set should not apply everywhere. A hospital feed, lab feed, vendor test feed, and customer onboarding pack can each have its own expectations. Clone a set, rename it, and adjust the rules for that partner or application.
The most useful export is a validation set that represents the messages you expect to receive. Send that set to a supplier or customer and they can check their messages before they reach your integration.
Common checks
- The wrong messages are turning red: check whether the rule is attached to the right field path and whether a Not condition is enabled.
- A date rule does not behave like a date: confirm the selected field is a date or date/time field so HL7 Soup can offer date-specific comparisons.
- A lookup table rule marks too many values invalid: confirm the feed really uses the standard HL7 table values, or create a customer-specific validation set.
- Comparison highlights more than expected: generate compare rules from the message that should be treated as the reference, then clear or clone sets before testing another comparison style.
- Partners need the same rules: export the validation set instead of describing the rules in a document. It is much easier to apply and much harder to misread.
Related tutorials
- Introduction to the HL7 Soup Editor
- HL7 message types of the MSH-9
- Validate HL7 messages against a profile
- What's new in HL7 Soup 2.3
- Return to the HL7 tutorial directory
Download 30 Day Free Trial of HL7 Soup
Video Transcript
Read the full transcript
Hello, and welcome to this tutorial where we look at how to validate, highlight, and compare your HL7 messages.
I'm going to start by loading HL7 Soup. We see here that it comes with a list of sample messages, and these are what I will use to demonstrate the features.
Let's start with the basics and look at how we can highlight a particular field in every message. For argument's sake, I will set my patient's last name to always highlight as green so I can easily find it. I'll quickly click in the interpretations window to find the last name, and now I can right-click and select to highlight the last name, PID-5.1, green whenever the field is in the message.
Now you can see that this field is highlighted green, and it shows that way for every message I have going forward. This makes it much easier to find.
You probably noticed, however, that the rules extend beyond just checking for its existence. If I go back to the highlights menu, I can select other options, like equaling or containing a certain value, or when it actually has any value. I can also go to the Not indicator and highlight where it is not a certain value or does not have a value.
If I highlight a date field, I get options that are more suitable to date values, such as greater than or less than. I can, for instance, highlight this date orange when it is older than 2014. This might be when a system change took place, and the orange can warn me of a risk.
Notice if I change this date, it only highlights when the date is older than 2014.
The red color highlight has been given additional functionality. It is reserved for invalid values, those that deserve special attention. One bug I find frequently with HL7 messages is invalid dates. It is surprisingly difficult to spot this issue without highlighters. Let's add a red invalid highlighter to this date field.
Now notice as I change this date's value to an invalid month, we see it instantly highlights it red, but it goes further and adds an error message to the interpretations window, and also highlights any other currently loaded messages that have the same problem.
If I right-click on my messages list, I can create a filter that shows only valid or invalid messages, so I can work through them and find my issues.
By the way, HL7 Soup has validations out of the box that check for invalid dates on the most popular HL7 message types.
Another popular highlighter shows when your fields need to have values that are in the lookup tables. Let me show you by marking any administrative sex fields, PID-8, invalid if they are not found in the data table. See how HL7 Soup instantly highlights all the messages and also gives a detailed description of what is wrong.
So now that we have some highlighters, let's see what can be done to manage these.
Navigate up to the Highlighters and Validation window, and we can see the list of current highlighters. From here we can change any of the existing highlighters we have made, including the ability to change the values to anything that we like, values that were not in the original message. We can even add custom text that will show in the field's tooltip or in the invalid message description.
Something I find extremely helpful is the ability to create different sets of validation. To clone an existing set, I simply click the plus button and give the new set a new name. This allows me to create rules specifically for a certain customer or application, then easily jump back and forth between them.
Perhaps most importantly of all, I can even export these validation sets to my colleagues or customers so they can take advantage of them. Imagine being able to create validation rules that ensure messages will work with a certain integration, and then allow others to use this. Your customers or suppliers could be given the set and have the chance to make sure their messages conform before you even get them.
From the management window, we can also generate a bulk list of highlighters from the existing message. This allows us to rapidly build large sets. For instance, let's validate all invalid dates and data tables.
If I go back to the sample messages, we can see that they all have lots of errors. This is because the samples come from real-world examples that did not often conform to the data tables. However, because of the highlighting, it is very easy to go through and fix these as required.
Now I'm going to create a new highlight set, clear out all highlighters, and show off some of the other generation features.
Firstly, there is the Does Not Exist highlighter. Once generated from an existing message, this will make sure that all other messages have the same segments and fields as a minimum. The fields do not need values, but they must at least be in the message. It simply creates a filter for the last field in each segment that ensures it is there.
Then we have the Value Is Empty highlighter. This scans the current message, looking through all fields and components. If they have a value in this message, then a highlighter will be created that suggests they need to be in other messages too. Fields missing from the current message do not have to be in other messages.
Finally, we have the Value Is Different highlighter, or simply the message comparer. It creates a highlighter for every field and component and checks that it has the same value. I can now take two messages and see exactly how they differ. I can even generate this from the second message so it highlights both ways. Very helpful when you are looking for subtle differences between messages.
Don't forget that HL7 Soup comes with a free 30 day trial, particularly helpful if you'd like your customers or suppliers to use your validation rules on their messages without cost.
You can download HL7 Soup by Googling HL7 Soup and clicking on the free trial.
Also, if you have found my videos have helped you, then please click like or subscribe to the series so YouTube can inform you when more tutorials are released.
Comments and suggestions for future videos are very welcome.