
Test HL7 ACK responses with Mirth Connect
What this tutorial builds
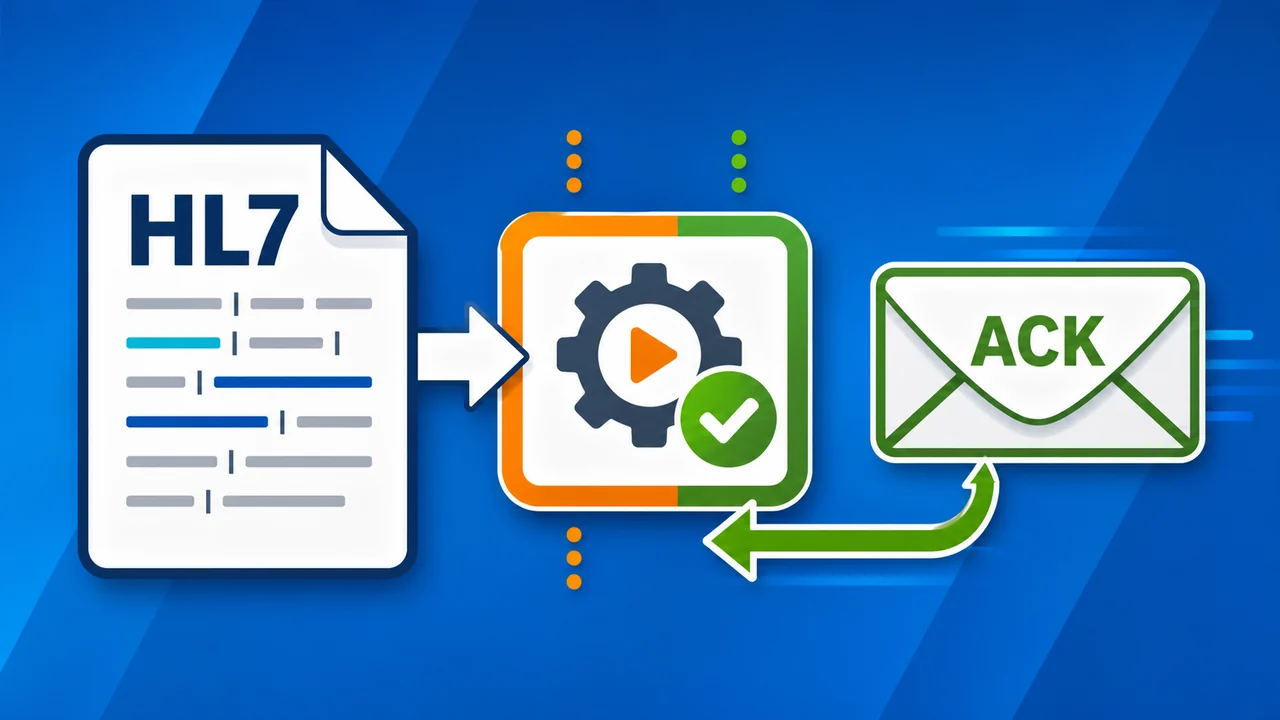
In this tutorial we create a Mirth Connect channel that randomly returns different HL7 message response ACKs. HL7 Soup is the message sender that connects to Mirth, sends sample HL7 messages, and displays the response details.
The useful part is the response testing. Instead of relying on a live system to sometimes accept, sometimes reject, and sometimes fail, you can make a controlled Mirth Connect endpoint that produces each outcome on demand. This gives you a practical way to test how your sender handles AA, AE, and AR style responses.
Before you start
- Mirth Connect installed and available in the Administrator.
- HL7 Soup installed so you can send sample HL7 messages and inspect the ACK responses.
- A local test port available. This walkthrough uses Mirth's MLLP listener on port
6661. - A few sample HL7 messages to send through the test endpoint.
- Permission to deploy a test channel in your Mirth Connect environment.
ACK outcomes used in the test
| Outcome | Meaning while testing | What the tutorial does in Mirth |
|---|---|---|
AA |
The message was accepted. | The JavaScript filter returns true. |
AE |
The endpoint accepted the message enough to respond, but reported an application error. | The JavaScript branch sets the response status to error. |
AR |
The endpoint rejects the message. | The JavaScript filter returns false. |
Step-by-step guide
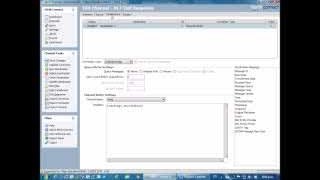
- Create a new Mirth Connect channel. Name it something clear, such as
HL7 Test Response, so the dashboard tells you exactly what this channel is for. - Configure the source as a TCP Listener. Open the source connector, choose TCP Listener, and use the standard HL7 MLLP transport on port
6661. - Leave the destination simple. The destination does not matter for this test channel because the tutorial is focused on the source response. You do not need to forward the message anywhere.
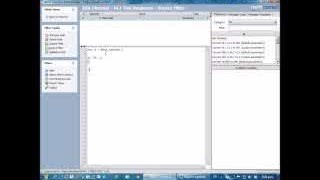
- Add a JavaScript source filter rule. Open the source filter, add a new rule, and change the rule type to JavaScript.
- Create a random value. Use
Math.random()to get a number between0and1. Store it in a variable such asd. - Split the random value into three branches. Use an
ifbranch for values below.3, anelse ifbranch for values below.6, and anelsebranch for the remaining values. - Log each branch first. Before changing the actual ACK behavior, add log statements for reject, error, and accept. Deploy the channel and send a few test messages so you know the random logic is selecting all three branches.
- Return a reject response. In the reject branch, return
falsefrom the filter. Mirth will treat that message as filtered or rejected. - Return an accept response. In the accept branch, return
truefrom the filter so the message is accepted. - Return an error response. In the error branch, use Mirth's reference panel to find the response-status helper, drag it into the script, and set the response status to error.
- Save and deploy the channel. Redeploy the channel after the filter logic is complete so the TCP listener is ready for HL7 Soup.
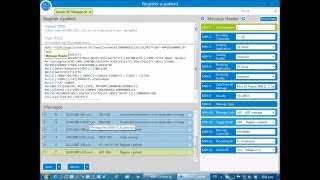
- Create an HL7 Soup sender. In HL7 Soup, create a sender named something like
Mirth Connect. Uselocalhostas the server when Mirth is running on the same machine, and set the port to6661. - Watch the ACK response types. Configure the sender to look for
AA,AE, andARresponse values, then send several sample messages. - Confirm the results in HL7 Soup. HL7 Soup will highlight the different outcomes so you can quickly see accepted messages, application errors, and rejected messages in the response list.
Why log before changing the response
It is much easier to prove the random branching logic before you make it affect the ACK. Start with log statements, deploy the channel, and send several messages. If the dashboard shows reject, error, and accept entries, then the random split is working.
After the branches are proven, switch the logic from logging to response behavior: return false; for reject, return true; for accept, and a Mirth response-status error for the error branch.
Useful checks and troubleshooting
- HL7 Soup cannot connect: confirm the Mirth channel is deployed and started, and that the HL7 Soup sender is pointed at
localhostport6661or the correct host and port for your environment. - Every message is rejected: check whether the filter still only logs branch names, or whether the script is returning
falsetoo early. - You never see the error outcome: make sure the error branch is reachable in the random logic and that the response status helper is setting the source response status, not just writing to the log.
- The random split feels uneven: send more messages. With only a few sends, random values can cluster. For predictable demos, temporarily replace
Math.random()with fixed values while testing each branch. - HL7 Soup does not color the responses as expected: confirm the sender is looking for the response acknowledgement codes you care about, such as
AA,AE, andAR.
Related tutorials
- Create a Mirth Connect relay with HL7 Soup
- Introduction to the HL7 Soup Editor
- Validate, highlight, and compare HL7 messages
- HL7 escape characters
- Return to the HL7 tutorial directory
Download 30 Day Free Trial of HL7 Soup
Video Transcript
Read the full transcript
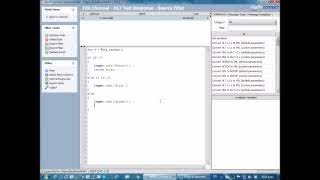
In this tutorial I'm going to look at creating some HL7 response messages for testing. For this I'm going to use Mirth Connect, and I'm going to create a new channel. I will call this HL7 Test Response.
I'm going to go across to the source and set that as a TCP Listener. It will be on the standard MLLP port, 6661. As for the destinations, I'm just going to leave the default. It is not going to matter where it actually goes, and I don't want it to go anywhere, so that's fine.
What I am going to do is come to the source and edit the filter. For the filter, I'm going to add a new rule, and inside here I'm going to create some JavaScript that will return the response that we want. I just have to drop down the type. I have some problems with Mirth; it always makes me click that several times before it actually works. Once I've chosen JavaScript, I can now put in the bit of code that we need in order to make this happen.
First of all, I'm going to make it random. I'm just going to create a variable, and it is going to equal Math.random(). That will return us a number between 0 and 1. I'm now going to use it to split into three different outcomes, so I'll say if d is less than .3, and under that scenario we'll do something. Then I'm going to take that bit of code and copy it down two more times. The next one is going to be .6, and finally an else.
Now we've got our three divisions. I'm going to put something in so we can test that out. I'm going to use the references that come with Mirth, search for log, and drop in a log statement. Under this scenario we're going to return a not-a-response. I wanted to reject it. In this instance I will throw an error, and accept on the final one.
Let's go and test that this logic works. We'll go back to the channel, save the channel, and deploy the Mirth script.
Now I'm going to use HL7 Soup to test these messages, so I have to configure it to talk to Mirth. I'm going to call this Mirth Connect. It's going to be on the same computer, so the server is the same. I'm just going to adjust this to support port 6661. I will be looking at the AA, AE, and AR messages that are returned from Mirth. This is exactly how I'd like it, so now I'm going to send off a few test messages.
You'll see that all of these come back as message rejected, no matter how many times I send it through. That's because at the moment Mirth is only logging what it chooses. If we look inside Mirth, we can see that we've got a list of reject, error, and accept messages, so that proves our logic is correct.
Let's go and actually add the full implementation. I'm going to go into the channel source, edit the filter, and put the logic into this. On the instance where we want to reject, we will return false in the filter. When we want to accept, we are going to return true to the filter.
When we want to create an error, again I'm going to use the references and just search for the word error. It gives me a set-response-status option. I'm going to drag that into place, and it sets the response status to error. That should be perfect.
Now I go back to my channel, save it, and deploy my channel. Then I'll head back to HL7 Soup. When we send, we should see random message responses coming back of different types. You can see the different colors highlighting the different types of messages: gray for the message rejected, blue for the accepts, and red when an error occurs.